Flutter : รู้จักกับ Redux Pattern ใน Flutter

Redux เป็นคอนเซ้ปที่ใช้ในการจัดการ State ในแอป (State Management) เป็นที่นิยมมาก ซึ่งใน Flutter ก็มีปัญหาเกี่ยวกับ State อยู่เหมือนกัน เช่น เมื่อแอปมีความซับซ้อนมากขึ้น การจัดการ State ก็ยิ่งจัดการยากขึ้น Redux จึงเป็นหนึ่งในตัวเลือกสำหรับจัดการกับปัญหานี้ โดยในบล็อกนี้ผมจะพาไปลองเล่นเกี่ยวกับ Redux ใน Flutter เพื่อเป็นไอเดียคร่าวๆว่า Redux มันแก้ปัญหาได้อย่างไรใน Flutter ส่วนพวกทฤษฎีจะไม่อธิบายหลักการเชิงลึกนะครับ
เริ่มต้น
เพิ่ม dependencies ของ flutter_redux ใน pubscpec.yaml แล้ว กด Packages get (ใน Android Studio เข้าไปที่ไฟล์ pubspec.yaml แล้วจะอยู่บนขวา)
dependencies:
  ...
  flutter_redux: 0.5.3
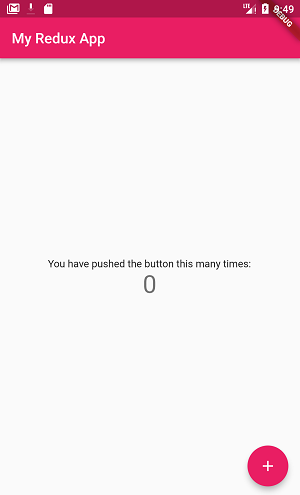
เริ่มต้นจากแอป Counter ที่จะเจอตอนเรา New Flutter Project
import 'package:flutter/material.dart';

void main() => runApp(MyApp());

class MyApp extends StatelessWidget {
  @override
  Widget build(BuildContext context) {
    return MaterialApp(
      title: 'My Redux App',
      theme: ThemeData(
        primarySwatch: Colors.pink,
      ),
      home: MyHomePage(title: 'My Redux App'),
    );
  }
}

class MyHomePage extends StatefulWidget {
  MyHomePage({Key key, this.title}) : super(key: key);
  final String title;

  @override
  _MyHomePageState createState() => _MyHomePageState();
}

class _MyHomePageState extends State<MyHomePage> {
  int _counter = 0;

  void _incrementCounter() {
    setState(() {
      _counter++;
    });
  }

  @override
  Widget build(BuildContext context) {
    return Scaffold(
      appBar: AppBar(

        title: Text(widget.title),
      ),
      body: Center(
        child: Column(
          mainAxisAlignment: MainAxisAlignment.center,
          children: <Widget>[
            Text(
              'You have pushed the button this many times:',
            ),
            Text(
              '$_counter',
              style: Theme.of(context).textTheme.display1,
            ),
          ],
        ),
      ),
      floatingActionButton: FloatingActionButton(
        onPressed: _incrementCounter,
        tooltip: 'Increment',
        child: Icon(Icons.add),
      ),
    );
  }
}
ลองรัน
ก่อนอื่นผมอยากจะชี้ให้เห็นปัญหา classic เกี่ยวกับ State คือ การเรียกคำสั่ง setState()
 void _incrementCounter() {
    setState((){
      _counter++;
    });
  }
โดยหลักการของแอป Counter คือเมื่อเรากดปุ่มบวก มันจะบวกค่าตัวแปร แล้วเรียกคำสั่ง setState() ผลคือหน้าจอจะถูก rebuild โดยเรียกคำสั่ง build(context) นั่นเอง
ซึ่งในหน้าจอของเราจะประกอบไปด้วย Widget หลายตัว เช่น Scaffold , AppBar , Column พวกนี้จะถูก rebuild ด้วย
ลองเพิ่มการปริ้นคอมเม้นเพื่อจำลองว่ามัน build อะไรไปบ้าง
  Widget build(BuildContext context) {
    print("build.. build(BuildContext)");
    print("build.. Scaffold");
    print("build.. AppBar");
    print("build.. Center");
    print("build.. Column");
    print("build.. Text");
    print("build.. FloatingActionButton");
    ...
ลองรัน แล้วกดปุ่มบวก จะเห็นว่า การกด 1 ครั้ง Widget จำนวนมากถูก rebuild โดยเปล่าประโยชน์ทั้งๆที่ ทั้งหน้านี้ สิ่งที่เราต้องการให้อัพเดท มีแค่ Text ตัวเลขเท่านั้นเอง

StatefulWidget ไม่จำเป็นอีกต่อไป
ในเมื่อ State จัดการยากนัก redux จึงหาทางจัดการกับมันด้วยการสร้าง Store เป็นที่เก็บ State ของตัวเองซะเลย ดังนั้นใน Flutter + Redux จะใช้แค่ StatelessWidget ก็เพียงพอ เพราะ State ทั้งหมด ถูกเก็บใน Store ของ redux แล้ว
class MyApp extends StatelessWidget {
  ...
  @override
  Widget build(BuildContext context) {
    ...
   }
}

class MyHomePage extends StatelessWidget {
   ...
}
State
เมื่อไม่ได้ใช้ StatefulWidget ก่อนอื่น จึงจำเป็นต้องสร้างคลาส State ของเราเองก่อน ในตัวอย่างที่นี้คือ การเก็บค่า counter
state_counter.dart
class CounterState {
  int counter;

  CounterState(this.counter);
}
Reducer
ต่อมา คือคลาสที่เรียกว่า Reducer จะเป็นการเขียนส่วนคำสั่งว่า มีคำสั่งอะไรบ้างที่จะเกิดขึ้นกับ State ของเรา
reducer จะเป็น Pure function คือมีแค่ dart ล้วนๆ และมีการ return คลาสของ State
ดังนั้น ก่อนเราจะสร้าง reducer เลยต้องสร้างคลาส State ก่อนนั่นเอง
โดย reducer จะมี 2 พารามิเตอร์ คือ State กับ Actions
ตัว action คือ key ที่จะบอกว่าให้ทำอะไร ซึ่งจะเป็นอะไรก็ได้ ปกตินิยมเป็น String ธรรมดา แค่พยายามอย่าให้ซ้ำกัน
ในตัวอย่างนี้ reducer ของผมหาก action รับค่ามาเป็น INCREASE_COUNTER ก็จะบวกค่า counter + 1 นั่นเอง
reducer_counter.dart
import 'package:flutter_redux_app/state_counter.dart';

CounterState counterReducer(CounterState state, dynamic action) {
  if (action == "INCREASE_COUNTER") {
     state.counter++;
     return state;
  }

  return state;
}
ViewModel
เมื่อเขียน State กับ Reducer แล้วต่อมาคือ ViewModel เป็นคลาสที่เก็บ State กับ functions ต่างๆ เพื่อต่อประสานกับ Widget และการเรียก reducer จะไม่เรียกจากหน้า Widget โดยตรงแต่จะเรียกผ่าน method ใน ViewModel
ในตัวอย่างนี้ ViewModel ผมให้ชื่อว่า CounterViewModel มีตัวแปร State กับ ฟังชันก์สำหรับเพิ่มค่า counter ชื่อว่า onIncreaseCounter
view_model_counter.dart
import 'package:flutter_redux_app/state_counter.dart';

class CounterViewModel{
  CounterState state;
  Function() onIncreaseCounter;

  CounterViewModel({this.state, this.onIncreaseCounter});
}
Store and StoreProvider
เมื่อเราเตรียม State , Reducer , ViewModel เสร็จแล้ว ถึงเวลานำ Store มาใช้
ก่อนอื่นที่ main.dart ให้ import package Redux และ package reducer , ViewModel ของเรา
import 'package:redux/redux.dart';
import 'package:flutter_redux/flutter_redux.dart';
import 'package:flutter_redux_app/reducer_counter.dart';
import 'package:flutter_redux_app/state_counter.dart';
import 'package:flutter_redux_app/view_model_counter.dart';
คำสั่งการสร้าง Store จำต้องระบุ State , Reducer และค่า State เริ่มต้น
Store<CounterState> store =
      Store<CounterState>(counterReducer, initialState: CounterState(0));
การสร้าง Store จำต้องอยู่นอก StatelessWidget กล่าวคืออยู่ใน main() ให้เราสร้าง store ก่อน แล้วค่อยเพิ่ม store ให้ StoreProvider ซึ่ง StoreProvider จะไปครอบ Widget อะไรก็ได้ที่เราต้องการให้จัดการ State และ StoreProvider ไม่จำเป็นต้องอยู่ใน main()
ตัวอย่างนี้ ผมสร้าง store ที่ main() แล้วเอา StoreProvider ครอบ MaterialApp
void main() {
  Store<CounterState> store =
      Store<CounterState>(counterReducer, initialState: CounterState(0));
  runApp(MyApp(store));
}

class MyApp extends StatelessWidget {
  final Store<CounterState> store;

  MyApp(this.store);

  @override
  Widget build(BuildContext context) {
    return StoreProvider<CounterState>(
        store: store,
        child: MaterialApp(
          title: 'My Redux App',
          theme: ThemeData(
            primarySwatch: Colors.pink,
          ),
          home: MyHomePage(title: 'My Redux App'),
        ));
  }
}

...

หรือจะเขียนแบบนี้ก็ได้
void main() {
  Store<CounterState> store = Store<CounterState>(counterReducer,
      middleware: [CounterMiddleware()], initialState: CounterState(0));

  runApp(StoreProvider<CounterState>(store: store, child: MyApp()));
}
StoreConnector
StoreConnector คือ Widget ที่เอาไว้ครอบ Widget อื่นๆที่ต้องการให้ build โดยใช้ค่าจาก Store
โดยมี Type parameter 2 ตัวคือ State และ ViewModel
ซึ่ง StoreConnector จะแบ่งงานเป็น 2 ส่วน คือ converter กับ builder
หลักการทำงานคือ มันจะเข้ามา converter() ก่อน ซึ่ง redux จะส่ง argument มาตัวนึงคือ store หน้าที่เราคือ ดึงค่า state จาก store แล้วนำมาสร้าง ViewModel แล้ว return ViewModel
ต่อมา ก็จะเข้าส่วน builder ซึ่งจะรับ ViewModel ที่สร้างมาเมื่อกี้ หน้าที่เรา คือ สร้าง Widget UI จากข้อมูล state ใน ViewModel
        StoreConnector<CounterState, CounterViewModel>(
            converter: (store) {
              // Get state from store by action reducer.
            },
            builder: (context, viewmodel) {
              // build UI.
            }));
สรุป StoreConnector<> ก็ทำงานประมาณนี้

มาเขียน StoreConnector ของเรากัน จุดที่เราต้องการ build Widget แล้วใช้ข้อมูลจาก Store ก็คือ Text ที่แสดงตัวเลข ดังนั้นเราก็เอา StoreConnector ไปครอบมันเลย
โดย state คือ CounterState ที่เราเขียนไว้แล้ว และ ViewModel คือ CounterViewModel ซึ่งเราก็เขียนไว้แล้ว
converter คือ สร้าง ViewModel จาก store ในที่นี้ คือ CounterViewModel หน้าที่เราก็แค่กำหนด CounterState ก็แค่ set ค่าให้มัน จบ
converter: (store) {
                return CounterViewModel(
                    state: store.state);
              }
ส่วนของ builder ก็เอาค่าจาก state ออกมาจาก ViewModel แล้วใส่ให้ Text
เพื่อแสดงผล
builder: (context, CounterViewModel model) {
                print("build Text");
                return Text(
                  model.state.counter.toString(),
                  style: TextStyle(fontSize: 36),
                );
              }
สรุปการใช้ StoreConnector กับ Text แสดงตัวเลข
class MyHomePage extends StatelessWidget {
  ...

  @override
  Widget build(BuildContext context) {
    ...
              StoreConnector<CounterState, CounterViewModel>(
                  converter: (store) {
                return CounterViewModel(
                    state: store.state,
                    onIncreaseCounter: () =>
                        store.dispatch("INCREASE_COUNTER"));
              }, builder: (context, CounterViewModel model) {
                print("build Text");
                return Text(
                  model.state.counter.toString(),
                  style: TextStyle(fontSize: 36),
                );
              }),
            ...
ยังไม่จบ ยังเหลือส่วนของปุ่ม (FloatingButton) ด้วยที่เราต้องใส่ StoreConnector ให้มันเพื่อให้กดแล้วไปเรียกอัพเดทค่าของ state ใน store
ก็เหมือนเดิมคือต้องเขียน converter กับ builder
converter ก็สร้าง ViewModel แต่คราวนี้ไม่ต้องกำหนดค่า state เพราะปุ่มเราไม่ได้เอาค่าไปใช้ แต่ให้กำหนดฟังก์ชันที่เราเตรียมไว้ ชื่อว่า onIncreaseCounter แทน
จุดสำคัญคือ การเรียกใช้ reducer จากตรงนี้ผ่านตัวแปร store จะใช้คำสั่ง store.dispatch(action) พารามิเตอร์คือ action ซึ่งตอนนี้เราใช้ “INCREASE_COUNTER”
 converter: (store) {
              return CounterViewModel(
                  onIncreaseCounter: () => store.dispatch("INCREASE_COUNTER"));
            }
builder ก็ return Widget คือ Button กลับไปโดยใส่ onPressed คือ ฟังก์ชันของเราใน ViewModel คือ onIncreaseCounter
builder: (context, CounterViewModel model) => FloatingActionButton(
                  onPressed: model.onIncreaseCounter,
                  child: Icon(Icons.add),
                )
สรุป StoreConnector ที่ FloatingButton
@override
  Widget build(BuildContext context) {
    return Scaffold(
                ...
       floatingActionButton: StoreConnector<CounterState, CounterViewModel>(
            converter: (store) {
              return CounterViewModel(
                  onIncreaseCounter: () => store.dispatch("INCREASE_COUNTER"));
            },
            builder: (context, CounterViewModel model) => FloatingActionButton(
                  onPressed: model.onIncreaseCounter,
                  child: Icon(Icons.add),
                ))
ลองรันจะเห็นว่าใช้งานได้ตามปกติ โดยที่ไมไ่ด้พึ่ง StatefulWidget หรือการ setState เลย
อีกทั้งการ build จะ build เฉพาะ Widget ที่จำเป็นเท่านั้นด้วย เพราะการใช้ StoreConnector ระบุ Widget ที่ต้องการ rebuild นั่นเอง

Actions
หลายคนคงขัดใจกับการใช้ hard code ของ Action เช่นคำว่า “INCREASE_COUNTER” ซึ่งจริงๆจะใช้แบบนี้ก็ไม่ผิดนะ แต่มันไม่สวย เกิดความซ้ำซ้อน และมีโอกาสที่พิมพ์ผิดสูงมาก
จึงนิยมใช้ ตัวแปร มากกว่า เช่น enum
ประกาศ enum
enum CounterActions { Increment }
ตัวอย่างการใช้งาน
CounterState counterReducer(CounterState state, CounterActions action) {
  if (action == CounterActions.Increment) {
     ...
  }
  ...
}
ตอน dispatch ก็ใช้แบบนี้
store.dispatch(CounterActions.Increment)
ซึ่งจะช่วยให้ code clean ขึ้น โอกาสการพิมพ์ผิดน้อยลง
Combine Reducers
ในความเป็นจริง ในแอปของเราไม่ได้มีแค่ reducer เดียวแน่ๆ การใช้หลาย reducer จะต้องนำ reducer มารวมกันก่อนด้วย method ชื่อว่า combineReducers
final counterReducer = combineReducers< STATE >([
  TypedReducer<STATE , ACTIONS>( FUNCTION ),
  TypedReducer<STATE , ACTIONS>( FUNCTION ),
  ...
]);
ตัวอย่างนี้ผมจะลองเพิ่ม reducer อีกตัว การทำงานของมันจะ reset ค่าเป็น 0
import 'package:flutter_redux_app/state_counter.dart';
import 'package:redux/redux.dart';

enum CounterActions { Increment, Decrement, ResetCounter }

final counterReducer = combineReducers<CounterState>([
  TypedReducer<CounterState, CounterActions>(setCounter),
  TypedReducer<CounterState, CounterActions>(resetCounter),
]);

CounterState setCounter(CounterState state, CounterActions action) {
  if (action == CounterActions.Increment) {
    state.counter++;
    return state;
  } else if (action == CounterActions.Decrement) {
    state.counter--;
    return state;
  }

  return state;
}

CounterState resetCounter(CounterState state, CounterActions action) {
  if (action == CounterActions.ResetCounter) {
    state.counter = 0;
    return state;
  }

  return state;
}
เมื่อเพิ่ม action ก็อาจจะต้องเพิ่มให้ ViewModel รองรับ action นั้นด้วย
class CounterViewModel {
  CounterState state;
  Function() onIncreaseCounter;
  Function() onDecreaseCounter;
  Function() onResetCounter;

  CounterViewModel(
      {this.state,
      this.onIncreaseCounter,
      this.onDecreaseCounter,
      this.onResetCounter});
}
ตัวอย่างปุ่ม reset ที่เราเอา StoreConnector มาครอบ การทำงานก็เหมือนปุ่มเพิ่ม ในตอนต้น ก็เปลี่ยน action เท่านั้น
  buildResetButton() {
    return Container(
        padding: EdgeInsets.all(16),
        child: StoreConnector<CounterState, CounterViewModel>(
            converter: (store) {
              return CounterViewModel(
                  state: store.state,
                  onResetCounter: () =>
                      store.dispatch(CounterActions.ResetCounter));
            },
            builder: (context, CounterViewModel model) => FloatingActionButton(
                  onPressed: model.onResetCounter,
                  child: Icon(Icons.refresh),
                )));
  }
}

Middleware
Middleware คือ listener ที่เราสามารถเพิ่มให้ดัก เมื่อ action ถูกเรียก
ก่อนอื่นสร้างคลาส CounterMiddleware implement MiddlewareClass
คลาส Middleware ปกติ สิ่งที่มันจะส่งมาให้เราคือ store , action , next(…)
อยากทำอะไรก็เช็คจาก action ได้เลย แล้วเรียก next(action) ปิดท้าย
middleware_counter.dart
import 'package:redux/redux.dart';

class CounterMiddleware implements MiddlewareClass{
  @override
  void call(Store store, action, NextDispatcher next) {
    next(action);
  }

}
ซึ่งในตัวอย่างนี้ ผมจะแค่ print action ออกมา
import 'package:redux/redux.dart';

class CounterMiddleware implements MiddlewareClass {
  @override
  void call(Store store, action, NextDispatcher next) {
    print(action);  // Add here.
    next(action);
  }
}
สุดท้ายเราต้องเพิ่ม middleware ไปที่ Store ซึ่งเป็น list จึงสามารถเพิ่มได้หลาย middleware
void main() {
  Store<CounterState> store = Store<CounterState>(
      counterReducer,
      middleware: [ CounterMiddleware() ],  // add here
      initialState: CounterState(0));
  ...
}
ดังนั้น พอเรากดปุ่ม มันจะเกิด action แล้วจะทำให้ middleware ถูกเรียกด้วย ก็จะปริ้น action ออกมานั่นเอง

สรุป
การใช้งาน redux คร่าวๆ จะเห็นว่า Redux พยายามจัดระเบียบให้โค้ดอยู่อย่างเป็นสัดส่วน และพยายามแก้ปัญหาเรื่องของ State คือนำ state มาเก็บใน store ของตัวเอง สร้าง class state ของเราเอง และใช้ reducer ในการเช็คและอัพเดท state โดยการส่ง actions เข้ามา จากนั้น ก็นำ StoreProvider ไปครอบ App Widget ของเรา ส่วน Widget ตัวไหนที่อยากให้ build โดยใช้ state ใน store จะใช้ StoreConector มาครอบ ซึ่ง StoreConector จะแบ่งงานเป็น 2 ส่วน คือ converter ที่แปลง state ใส่ ViewModel และ builder ที่แปลง ViewModel เป็น Widget สุดท้ายหากต้องการใช้ reducer หลายตัวต้องนำมาใส่ method combineReducer() ก่อน
Source code ตัวอย่างอยู่บน Github ครับ
https://github.com/benznest/counter-app-with-redux-flutter
BLoC Pattern
Pattern อีกตัวที่นิยมใช้ใน Flutter ครับ อ่านได้ที่
 Previous Post
 Next Post