การทำ Animation ใน Flutter ตอนที่ 1

สวัสดีผู้อ่านครับ หากใครเคยเขียน Native ใน Android หรือ iOS จะรู้ว่า Animation เป็นหนึ่งในฟีเจอร์ที่ดูเข้าถึงยาก แต่ไม่ใช่สำหรับ Flutter ที่เราสามารถเขียน Animation ได้เอง และไม่ได้ยากอย่างที่คิด บทความนี้จะพาไปลองเล่นการทำ Animation แบบต่างๆ ใน Flutter ครับ ซึ่งมีให้เล่นเยอะมาก
ก่อนจะเริ่ม Animation ใน Flutter จะขอเริ่มจากแนะนำ TickerProviderStateMixin ที่เราจะเพิ่มเจ้านี่ให้กับ State ของเรา ซึ่งมันคือ mixin class ประเภทนึง
หากไม่รู้จัก mixin คืออะไร สรุปสั้นๆมันคือ วิธีที่ช่วยให้ class เราสามารถสืบทอด class ได้มากกว่า 1 class ส่วนวิธีการใช้งานเพิ่มเติม อ่านได้จากบล็อกของผม สรุปให้ข้างล่างนี้ครับ
TickerProviderStateMixin จะช่วยให้ State ของเราสามารถดักจับ callback ของ animation frame ได้ ดังนั้น ถ้าเราจะใช้งานเกี่ยวกับ animation ที่เราสามารถควบคุมได้เอง มักจะต้องใช้ mixin ประเภทนี้ วิธีการใช้งานก็คือใช้ keyword with
class _MyHomePageState extends State<MyHomePage> with TickerProviderStateMixin {Animation Controller
ต่อมาคือ Animation Controller มันคือ ส่วนควบคุม animation เช่น เวลาการแสดงของ animation การสั่งให้ animation ทำงาน หรือหยุดทำงาน ในตัวอย่างนี้ผมจะกำหนดเวลา animation 1.2 วินาที และให้มันทำงานทันทีหลังจากเปิดหน้าจอขึ้นมา
การสั่งให้ animation ทำงานจะใช้ .forward() และกลับคือ .reverse()
class _MyHomePageState extends State<MyHomePage> with TickerProviderStateMixin {
  AnimationController animationController;

  @override
  void initState() {
    animationController = AnimationController(duration: Duration(milliseconds: 1200), vsync: this );
    super.initState();

    // run animation.
    animationController.forward();
  }

  @override
  void dispose() {
    animationController.dispose();
    super.dispose();
  }
หน้าจอของเราที่ build() กำหนด Widget Text ตัวนึงที่แสดงค่าของ value ใน animation controller
  @override
  Widget build(BuildContext context) {
    return Scaffold(
      appBar: AppBar(
        title: Text("Animation"),
      ),
      body: Center(
                child: Text("${animationController.value}",style: TextStyle(fontSize: 32),
              )),
 );
}
ลองรันจะพบว่า animation มันรันแปบนึง แล้วไม่ทำงานแหะ

เหตุผลคือ ไม่ใช่เพราะ animation controller ไม่ทำงาน แต่เพราะ ตอน animation frame เปลี่ยน เราไม่ได้เรียก setState เพื่ออัพเดท UI นั่นเอง วิธีการคือให้เพิ่ม addListener ให้กับ animation controller เพื่อให้ เมื่อ animation frame เปลี่ยน เราจะได้อัพเดทหน้าจอตามค่าของมัน คือเรียก setState()
  @override
  void initState() {
    animationController = AnimationController(duration: Duration(milliseconds: 1000), vsync: this);
    animationController.addListener(() {      // เพิ่มบรรทัดนี้
      setState(() {                           // เพิ่มบรรทัดนี้
        print(animationController.value);     // เพิ่มบรรทัดนี้
      });                                     // เพิ่มบรรทัดนี้
    });                                       // เพิ่มบรรทัดนี้
    super.initState();

    // run animation.
    animationController.forward();
  }
ลองรัน จะเห็นว่าสิ่งที่ animation controller ทำคือ วิ่งรันค่า 0 ถึง 1 นั่นก็คือ ค่า value ใน animation controller จะมีค่า 0 ถึง 1 เสมอ เป็นตัวกำหนดค่าของเวลาใน animation ดังนั้นหาก animation ที่มีระยะเวลานานก็จะใช้เวลาเพิ่มค่าจาก 0 ไปหา 1 นาน และค่าทศนิยมก็จะละเอียดขึ้นจากนั้น ก็สามารถนำค่าระหว่างนั้นไปแปลงเป็นค่าต่างๆ

พอจะเห็นไอเดียหลักการทำงานของ Animation controller แล้วใช่ไหมครับ
Fade Transition
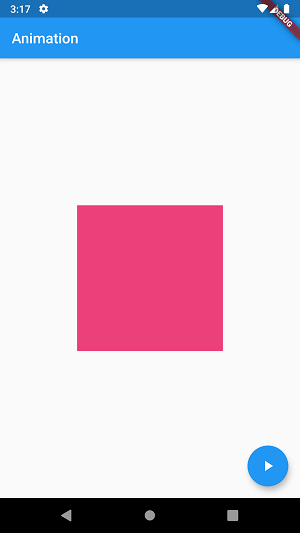
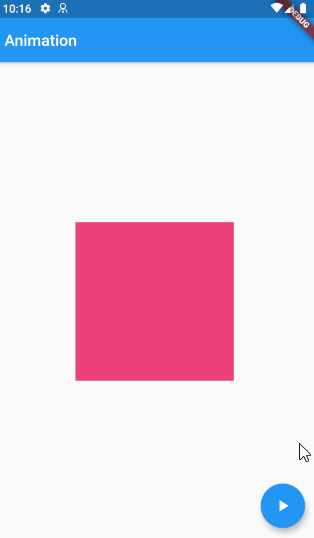
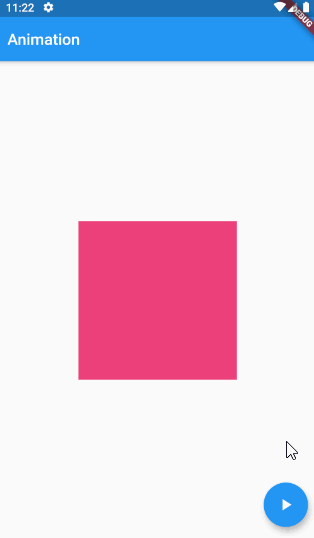
มาลองใช้งาน Animation กับ Widget อื่นๆกัน โดยผมจะเพิ่ม Container ขนาด 200×200 สีชมพู แล้วเพิ่ม FloatingActionButton สำหรับกดแล้วรัน forward หรือ reverse ของ animation
class _MyHomePageState extends State<MyHomePage> {
  @override
  Widget build(BuildContext context) {
    return Scaffold(
      appBar: AppBar(
        title: Text("Animation"),
      ),
      body: Center(                             // เพิ่ม container
        child: Container(                       // เพิ่ม container
                  width: 200,                   // เพิ่ม container
                  height: 200,                  // เพิ่ม container
                  color: Colors.pink[400],)     // เพิ่ม container
      ),
      floatingActionButton: FloatingActionButton(      // เพิ่ม floating button
        child: Icon(Icons.play_arrow),                 // เพิ่ม floating button
        onPressed: () {                                // เพิ่ม floating button
          //
        },
      ),
    );
  }
}
ลองรัน ได้ container นิ่งๆ แล้ว
มาลองใช้ Animation กับ container กัน โดยตัวอย่างง่ายที่สุด คือใช้ Widget ที่ชื่อว่า Opacity ที่จะสามารถทำให้ Widget transparent ได้ ซึ่งค่า Opacity ก็มีค่า 0..1 โดย 0 คือ transparent และ 1 คือปกติ จะเห็นว่ามันมีค่า 0..1 แบบเดียวกับ value ใน Animation controller เลย ดังนั้นเราจึงสามารถทำ Fade transition ได้ ด้วยการให้ Animation controller รันค่า opacity 0..1 ของ Opacity นั่นเอง
  @override
  Widget build(BuildContext context) {
    return Scaffold(
      ...
      body: Center(
          child: Opacity(
        opacity: animationController.value, // ใช้ value ของ animation controller
        child: Container(
          width: 200,
          height: 200,
          color: Colors.pink[400],
        ),
      )),
      ...
    );
  }
เพิ่มส่วนการเรียกใช้งาน animation ที่ตอนคลิกที่ FloatingActionButton
  @override
  Widget build(BuildContext context) {
    return Scaffold(
      ...

      floatingActionButton: FloatingActionButton(
        child: Icon(Icons.play_arrow),
        onPressed: () {                               // เพิ่ม on pressed
            if (animationController.isCompleted) {    //
              animationController.reverse();          //
            } else {                                  //
              animationController.forward();          //
            }                                         //
        },                                            //
      ),
    );
  }
จากนั้นเพื่อไม่ให้ animation รันตั้งแต่เปิดหน้าจอ ลบ controller.forward() ที่ initState() ออก เพราะเราจะกดจากปุ่มแทน
  @override
  void initState() {
    animationController = AnimationController(duration: Duration(milliseconds: 1200), vsync: this );
    super.initState();

    // ลบ
    // animationController.forward();
  }
ลองรัน แล้วกดปุ่ม เราจะได้ Fade transition แล้ว

Tween
จะเห็นว่าการทำ Animation แบบที่กล่าวไป นั้นค่อนข้างผูกติดกับ value ใน Animation controller ซึ่งจะทำได้แค่ type double และมีค่า 0..1 แถมยังทำ curve ให้กับ Animation ไม่ได้ จึงมี Widget อีกตัวที่ชื่อว่า Tween ที่สามารถทำ Animate กับ datatype ได้หลากหลายมากขึ้น แต่ก็ยังต้องใช้ animation controller เหมือนเดิม โดยการใช้ Tween แค่กำหนด begin , end และ animation controller จากนั้นก็ใช้ value ใน Tween แทน
  @override
  Widget build(BuildContext context) {
    var tween = Tween<double>(
                   begin: 0,
                   end: 1).animate(animationController);

    return Scaffold(
      ...
      body: Center(
          child: Opacity(
        opacity: tween.value,
        child: Container(
          width: 200,
          height: 200,
          color: Colors.pink[400],
        ),
      )),
      ...
    );
  }
ได้ Fade Transition เหมือนกัน

เพื่อให้เห็นภาพการใช้ Tween ลองดูอีกตัวอย่างครับ โดยจะใช้ animate ค่า 0..250 และนำ value ไปใช้แสดงขนาด container
  @override
  Widget build(BuildContext context) {
    var tween = Tween<double>(
                   begin: 0,
                   end: 250).animate(animationController);

    return Scaffold(
      ...
      body: Center(
          child:
         Container(
          width: tween.value / 2,
          height: tween.value,
          color: Colors.pink[400],
      )),
      ...
    );
  }
จริงๆ Tween ยังมีให้ลองเล่นอีกหลายตัวเช่น ColorTween , AlignmentTween และ การทำ Custom Tween เดี๋ยวจะพาไปลองเล่นกันในตอนถัดไปนะ
Animated Builder
ตอนนี้เรารู้จัก Animation controller และ Tween แล้ว ซึ่งเพียงพอกับการทำ Animation แล้วละ แต่ว่าทาง Flutter ก็ทำ Widget อื่นๆมาเสริมอีกหลายตัว ขอเรียกว่าแก๊ง Animated ละกัน นั่นก็เพื่อให้การทำ Animation จัดเป็น Widget ในตัวเดียว ทำให้ตัวโค้ดอ่านง่ายขึ้น ซึ่งมีหลายตัว ตัวที่จะแนะนำตัวแรกคือ AnimatedBuilder ตามชื่อของมัน มันคือ Widget ที่ช่วยสร้าง Animated
AnimatedBuilder จะมี parameter 3 ส่วน คือ
animation controller ซึ่งเรามีอยู่แล้ว
child คือ widget ที่เราต้องการใส่ animation ให้ ในตัวอย่างนี้คือ container สีชมพู
builder คือ function ที่ให้เรากำหนด Transition ให้กับ child
Fade Transition
ตัวอย่างนี้ ผมจะทำ Fade Transition เหมือนที่ทำก่อนหน้านี้ โดยจะเขียนเป็น method แยกไว้สำหรับทำ Fade กับ widget อะไรก็ได้ ลองอ่านโค้ดด้านล่าวจะเห็นว่าเข้าใจได้ง่ายมาก ว่ากำลังทำ FadeTransition ให้กับ widget ที่รับ parameter เข้ามา โดยค่า opacity มีค่า 0 ถึง 1
  Widget buildFadeTransitionWidget({AnimationController controller, Widget widget}) {
    return AnimatedBuilder(
        animation: controller,
        child: widget,
        builder: (context, child) {
          return FadeTransition(opacity:
                    Tween<double>(
                         begin: 0,
                         end: 1
                    ).animate(controller),
                 child: child);
        });
  }
โดยปกติ curve ของ animation จะเป็นแบบ linear แต่หากต้องการ custom ก็สามารถกำหนด Curve ได้ โดยใช้ CurvedAnimation
    ...
    return AnimatedBuilder(
        ...
        builder: (context, child) {
          return FadeTransition(opacity:
                     Tween<double>(
                        begin: 0,
                        end: 1
                     ).animate(CurvedAnimation(      // เพิ่ม Curve
                        parent: controller,          // เพิ่ม Curve
                        curve: Curves.decelerate)),  // เพิ่ม Curve
                 child: child);
        });
  }
ทีนี้เราก็เอา method ที่เขียนไว้มาใช้กับ widget ที่เราต้องการ ในตัวอย่างนี้คือ container ของเรา
@override
Widget build(BuildContext context) {
   return Scaffold(
      ...
      body: Center(
           child: buildFadeTransitionWidget(
              controller: animationController,
               widget: Container(
                        width: 200,
                        height: 200,
                        color: Colors.pink[400],
                      )
           )
       )
    );
}
Scale Transition
ลองเล่น scale transition โดยเพิ่มเป็น method อีกอันนึง การใช้งานคล้ายกับ FadeTransition โดย ScaleTransition จะช่วยให้เรากำหนด animation ของ scale ได้ เช่น เล็กแล้วค่อยๆขยายขึ้น
  Widget buildScaleTransitionWidget({AnimationController controller, Widget widget}) {
    return AnimatedBuilder(
        animation: controller,
        child: widget,
        builder: (context, child) {
          return ScaleTransition(scale:
                    Tween<double>(
                       begin: 0,
                       end: 1).animate(controller),
                    child: child);
        });
  }
จากนั้นลองเอาไปใช้กับ widget container ของเรา
  @override
  Widget build(BuildContext context) {
    return Scaffold(
      ...
      body: Center(
          child: buildScaleTransitionWidget(
              controller: animationController,
              widget: Container(
                width: 200,
                height: 200,
                color: Colors.pink[400],
              ))),
ได้แล้ว

Rotate transition
ลองเล่น Animation การหมุน rotate transition ช่วยให้สามารถกำหนดจำนวนการหมุนได้ เช่น 0.5 คือ ครึ่งรอบ
  Widget buildRotateTransitionWidget({AnimationController controller, Widget widget}) {
    return AnimatedBuilder(
        animation: controller,
        child: widget,
        builder: (context, child) {
          return RotationTransition(turns: Tween<double>(begin: 0, end: 0.5).animate(controller), child: child);
        });
  }
Size Transition
Animation ที่จะเล่นกับขนาดของ Widget สามารถกำหนด size Factor ได้ คือให้ทำ animation จนถึงขนาดเท่าไหร่ เช่น size factor 0.5 ก็คือ ขนาดครึ่งนึงของปกติ ส่วน axisAlignment สามารถกำหนดค่าได้ทั้ง + และ – โดยหากเรากำหนดเป็นแนว horizontal ค่า + จะเลื่อนมาจากทางซ้าย และค่าของมันคือระยะที่จะทำให้ animation เปลี่ยนขนาด อธิบายยากแหะ ต้องลองไปรัน แล้วเล่นดูนะ
  Widget buildSizeTransitionWidget({AnimationController controller, Widget widget}) {
    return AnimatedBuilder(
        animation: controller,
        child: widget,
        builder: (context, child) {
          return SizeTransition(axis: Axis.horizontal,
                    axisAlignment: 1,
                    sizeFactor: Tween<double>(
                        begin: 0,
                        end: 1).animate(controller),
                    child: child);
        });
  }
ลองนำมาใช้ กับ Widget ซึ่งต้องเพิ่ม Center ให้กับ container อีกชั้น ไม่อย่างนั้นมันจะไม่อยู่ตรงกลาง
  @override
  Widget build(BuildContext context) {
    return Scaffold(
      ...
      body: Center(
          child: buildSizeTransitionWidget(
              controller: animationController,
              widget: Center(
                child: Container(
                  width: 200,
                  height: 200,
                  color: Colors.pink[400],
                ),
              ))),
ลองรัน
Multi Transition
ทีนี้เมื่อเราทำ transition ได้หลายๆแบบแล้ว เราจะสามารถนำ transition มาใช้ง่านร่วมกันได้แล้ว โดยนำ transition มาเป็น child ของอีก transition หนึ่ง
  Widget buildMultiTransitionWidget({AnimationController controller, Widget widget}) {
    return buildScaleTransitionWidget(                 // Scale
        controller: controller,
        widget: buildFadeTransitionWidget(             // Fade
            controller: controller,
            widget: buildRotateTransitionWidget(       // Rotate
                controller: controller,
                widget: buildSizeTransitionWidget(     // Size
                    controller: controller,
                    widget: widget))));
  }
จะได้แบบนี้

สรุป
ในตอนที่ 1 นี้ได้รู้จักกับ Animation Controller และการใช้ Tween แบบง่ายๆ รวมถึง Animated Builder ที่เป็น Widget ที่ทาง Flutter เตรียมให้สำหรับสร้าง Animation ให้กับ widget ที่เราต้องการ ในตอนหน้าจะพาไปรู้จักกับ Widget ตัวอื่นๆของ Animation และการสร้าง Animation ที่ซับซ้อนขึ้นครับ (:
Source code
https://gist.github.com/benznest/e03fcbe5dd7ea886942115849d5f59bc
ตอนที่ 2
 Previous Post
 Next Post